Raspberry pi Image Classifier with Intel Movidius ( Neural Compute Stick )
What is Image Classification?
Image classification is a computer vision problem that aims to classify a subject or an object present in an image into predefined classes. A typical real-world example of image classification is showing an image flash card to a toddler and asking the child to recognize the object printed on the card. Traditional approaches to providing such visual perception to machines have relied on complex computer algorithms that use feature descriptors, like edges, corners, colors, and so on, to identify or recognize objects in the image.
Deep learning takes a rather interesting, and by far most efficient approach, to solving real-world imaging problems. It uses multiple layers of interconnected neurons, where each layer uses a specific computer algorithm to identify and classify a specific descriptor. For example if you wanted to classify a traffic stop sign, you would use a deep neural network (DNN) that has one layer to detect edges and borders of the sign, another layer to detect the number of corners, the next layer to detect the color red, the next to detect a white border around red, and so on. The ability of a DNN to break down a task into many layers of simple algorithms allows it work with a larger set of descriptors, which makes DNN-based image processing much more effective in real-world applications.

Hardware
- Raspberry pi 3B or 3B+ and SD card 16 GB or more
- Intel Movidius ( Neural Computer Stick )
- Python 3.x
- OpenCV 3.3.0 ( Install OpenCV )
- NCSDK 2.xx ( Install NCSDK )
- ncappzoo ( more info )

image-classifier
Perform image classification using deep neural networks (DNNs) on Intel® Movidius™ Neural Compute Stick (NCS). The NCS developer blog has a step by step tutorial on how to build this project, and also has a detailed explanation of the source code.
Let's begin
Change Directory
pi@raspberrypi:~ $ cd ncappzoo/apps/image-classifier/
pi@raspberrypi:~/ncappzoo/apps/image-classifier $
File
pi@raspberrypi:~/ncappzoo/apps/image-classifier $ ls
AUTHORS image-classifier.py Makefile README.md screen_shot.jpg
Make Help
pi@raspberrypi:~/ncappzoo/apps/image-classifier $ make help
possible make targets:
make help - Shows this message
make - Builds all dependencies, but does not run this program
make run - Runs this program
make clean - removes files files and directories created in this directory
Make
pi@raspberrypi:~/ncappzoo/apps/image-classifier $ make
\making ilsvrc12
(cd ../../data/ilsvrc12; make;)
make[1]: Entering directory '/home/pi/ncappzoo/data/ilsvrc12'
make[1]: Leaving directory '/home/pi/ncappzoo/data/ilsvrc12'
making googlenet
(cd ../../caffe/GoogLeNet; make compile;)
make[1]: Entering directory '/home/pi/ncappzoo/caffe/GoogLeNet'
making prereqs
(cd ../../data/ilsvrc12; make)
make[2]: Entering directory '/home/pi/ncappzoo/data/ilsvrc12'
make[2]: Leaving directory '/home/pi/ncappzoo/data/ilsvrc12'
making prototxt
Prototxt file already exists
making caffemodel
caffemodel file already exists
making compile
mvNCCompile -w bvlc_googlenet.caffemodel -s 12 deploy.prototxt
.
.
mvNCCompile v02.00, Copyright @ Intel Corporation 2017
Layer inception_3b/1x1 forced to im2col_v2, because its output is used in concat
/usr/local/bin/ncsdk/Controllers/FileIO.py:65: UserWarning: You are using a large type. Consider reducing your data sizes for best performance
Blob generated
make[1]: Leaving directory '/home/pi/ncappzoo/caffe/GoogLeNet'
Run Python code
pi@raspberrypi:~/ncappzoo/apps/image-classifier $ python3 image-classifier.py
/usr/local/lib/python3.5/dist-packages/skimage/transform/_warps.py:105: UserWarning: The default mode, 'constant', will be changed to 'reflect' in skimage 0.15.
warn("The default mode, 'constant', will be changed to 'reflect' in "
/usr/local/lib/python3.5/dist-packages/skimage/transform/_warps.py:110: UserWarning: Anti-aliasing will be enabled by default in skimage 0.15 to avoid aliasing artifacts when down-sampling images.
warn("Anti-aliasing will be enabled by default in skimage 0.15 to "
/usr/local/lib/python3.5/dist-packages/mvnc/mvncapi.py:418: DeprecationWarning: The binary mode of fromstring is deprecated, as it behaves surprisingly on unicode inputs. Use frombuffer instead
tensor = numpy.fromstring(tensor.raw, dtype=numpy.float32)
==============================================================
Top predictions for cat.jpg
Execution time: 93.694756ms
--------------------------------------------------------------
40.5% n02123159 tiger cat
32.6% n02123045 tabby, tabby cat
8.9% n02124075 Egyptian cat
5.0% n02127052 lynx, catamount
1.2% n04074963 remote control, remote
==============================================================
If you run on VNC or Raspberry pi Desktop.It's show the Image.

Code Parameter

GRAPH_PATH: Location of the graph file, against with we want to run the inference By default it is set to ~/workspace/ncappzoo/caffe/GoogLeNet/graphIMAGE_PATH: Location of the image we want to classify
By default it is set to
~/workspace/ncappzoo/data/images/cat.jpgIMAGE_DIM: Dimensions of the image as defined by the choosen neural network ex. GoogLeNet uses 224x224 pixels, AlexNet uses 227x227 pixelsIMAGE_STDDEV: Standard deviation (scaling value) as defined by the choosen neural network ex. GoogLeNet uses no scaling factor, InceptionV3 uses 128 (stddev = 1/128)
IMAGE_MEAN: Mean subtraction is a common technique used in deep learning to center the dataFor ILSVRC dataset, the mean is B = 102 Green = 117 Red = 123
If you want to change image
python3 image-classifier.py -i image file
Ex.
python3 image-classifier.py -i ../../data/images/pic_005.jpg

Python Code
Before using the NCSDK API framework, we have to import mvncapi module from mvnc library
import mvnc.mvncapi as mvncStep 1: Open the enumerated device
Just like any other USB device, when you plug the NCS into your application processor’s (Ubuntu laptop/desktop) USB port, it enumerates itself as a USB device. We will call an API to look for the enumerated NCS device.
# Look for enumerated Intel Movidius NCS device(s); quit program if none found.
devices = mvnc.EnumerateDevices()
if len( devices ) == 0:
    print( 'No devices found' )
    quit()
Did you know that you can connect multiple Neural Compute Sticks to the same application processor to scale inference performance? More about this in a later blog, but for now let’s call the APIs to pick just one NCS and open it (get it ready for operation).
# Get a handle to the first enumerated device and open it
device = mvnc.Device( devices[0] )
device.OpenDevice()
Step 2: Load a graph file onto the NCS
To keep this project simple, we will use a pre-compiled graph of a pre-trained AlexNet model, which was downloaded and compiled when you ran
make inside the ncappzoo folder. We will learn how to compile a pre-trained network in an another blog, but for now let’s figure out how to load the graph into the NCS.# Read the graph file into a buffer
with open( GRAPH_PATH, mode='rb' ) as f:
blob = f.read()
# Load the graph buffer into the NCS
graph = device.AllocateGraph( blob )Step 3: Offload a single image onto the Intel Movidius NCS to run inference
The Intel Movidius NCS is powered by the Intel Movidius visual processing unit (VPU). It is the same chip that provides visual intelligence to millions of smart security cameras, gesture controlled drones, industrial machine vision equipment, and more. Just like the VPU, the NCS acts as a visual co-processor in the entire system. In our case, we will use the Ubuntu system to simply read images from a folder and offload it to the NCS for inference. All of the neural network processing is done solely by the NCS, thereby freeing up the application processor’s CPU and memory resources to perform other application-level tasks.
In order to load an image onto the NCS, we will have to pre-process the image.
- Resize/crop the image to match the dimensions defined by the pre-trained network.
- GoogLeNet uses 224x224 pixels, AlexNet uses 227x227 pixels.
- Subtract mean per channel (Blue, Green and Red) from the entire dataset.
- This is a common technique used in deep learning to center the data.
- Convert the image into a half-precision floating point (fp16) array and use
LoadTensorfunction-call to load the image onto NCS.- skimage library can do this in just one line of code.
# Read & resize image [Image size is defined during training]
img = print_img = skimage.io.imread( IMAGES_PATH )
img = skimage.transform.resize( img, IMAGE_DIM, preserve_range=True )

# Convert RGB to BGR [skimage reads image in RGB, but Caffe uses BGR]
img = img[:, :, ::-1]

# Mean subtraction & scaling [A common technique used to center the data]
img = img.astype( numpy.float32 )
img = ( img - IMAGE_MEAN ) * IMAGE_STDDEV

# Load the image as a half-precision floating point array
graph.LoadTensor( img.astype( numpy.float16 ), 'user object' )
Step 4: Read and print inference results from the NCS
Depending on how you want to integrate the inference results into your application flow, you can choose to use either a blocking or non-blocking function call to load tensor (previous step) and read inference results. We will learn more about this functionality in a later blog, but for now let’s just use the default, which is a blocking call (no need to call a specific API).
# Get the results from NCS
output, userobj = graph.GetResult()

# Print the results
print('\n------- predictions --------')

labels = numpy.loadtxt( LABELS_FILE_PATH, str, delimiter = '\t' )

order = output.argsort()[::-1][:6]
for i in range( 0, 5 ):
    print ('prediction ' + str(i) + ' is ' + labels[order[i]])

# Display the image on which inference was performed
skimage.io.imshow( IMAGES_PATH )
skimage.io.show( )
Step 5: Unload the graph and close the device
In order to avoid memory leaks and/or segmentation faults, we should close any open files or resources and deallocate any used memory.
graph.DeallocateGraph()
device.CloseDevice()
This code runs GoogLeNet by default, but you can configure it run other pre-trained deep neural networks. Below are some example commands:
AlexNet (Caffe)
python3 image-classifier.py --graph ../../caffe/AlexNet/graph --dim 227 227 --image ../../data/images/pic_053.jpg
SqueezeNet (Caffe)
python3 image-classifier.py --graph ../../caffe/SqueezeNet/graph --dim 227 227 --image ../../data/images/pic_053.jpg
Mobilenet (Tensorflow)
python3 image-classifier.py --graph ../../tensorflow/mobilenets/model/graph --labels ../../tensorflow/mobilenets/model/labels.txt --mean 127.5 --scale 0.00789 --dim 224 224 --colormode="RGB" --image ../../data/images/pic_053.jpg
Inception (Tensorflow)
python3 image-classifier.py --graph ../../tensorflow/inception/model/v3/graph --labels ../../tensorflow/inception/model/v3/labels.txt --mean 127.5 --scale 0.00789 --dim 299 299 --colormode="RGB" --image ../../data/images/pic_053.jpg 
Test with TensorFlow Inception Model.
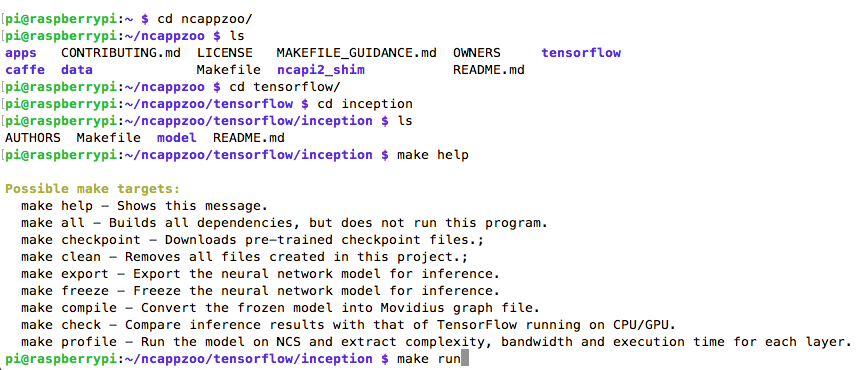
Change Directory to ~/ncappzoo/tensorflow/inception
pi@raspberrypi:~/ncappzoo/tensorflow/inception $ make help
Possible make targets:
make help - Shows this message.
make all - Builds all dependencies, but does not run this program.
make checkpoint - Downloads pre-trained checkpoint files.;
make clean - Removes all files created in this project.;
make export - Export the neural network model for inference.
make freeze - Freeze the neural network model for inference.
make compile - Convert the frozen model into Movidius graph file.
make check - Compare inference results with that of TensorFlow running on CPU/GPU.
make profile - Run the model on NCS and extract complexity, bandwidth and execution time for each layer.
pi@raspberrypi:~/ncappzoo/tensorflow/inception $ make all
TF_SRC_PATH not set, making tf_src
(cd ../tf_src; make all; cd /home/pi/ncappzoo/tensorflow/inception)
make[1]: Entering directory '/home/pi/ncappzoo/tensorflow/tf_src'
TF_SRC_PATH not set, will use project directory
TF_SRC_PATH is now: /home/pi/ncappzoo/tensorflow/tf_src/tensorflow
skipping clone, directory already exists: /home/pi/ncappzoo/tensorflow/tf_src/tensorflow
make[1]: Leaving directory '/home/pi/ncappzoo/tensorflow/tf_src'
TF_SRC_PATH is /home/pi/ncappzoo/tensorflow/inception/../tf_src/tensorflow
Downloading checkpoint files...
.....
Exporting GraphDef file...
..
...
Freezing model for inference...
..
...Profiling the model...
..
...
Run Python Code
python3 image-classifier.py -g ../../tensorflow/inception/model/v3/graph -D 299 299 -M 127.5 -S 0.00789 -l ../../tensorflow/inception/model/v3/labels.txt -i ~/ncappzoo/data/images/cat.jpg
==============================================================
Top predictions for cat.jpg
Execution time: 317.015ms
--------------------------------------------------------------
54.7% 286:Egyptian cat
21.8% 282:tabby, tabby cat
8.6% 283:tiger cat
3.7% 288:lynx, catamount
2.3% 285:Siamese cat, Siamese
==============================================================

Reference
https://movidius.github.io/blog/ncs-image-classifier/
https://github.com/movidius/ncappzoo/
My Website
email : info@softpowergroup.net ,amphancm@gmail.com Tel .+6681-6452400


