Raspberry Pi connect TFT LCD
with Python Library from Adafruit

Hardware
- Raspberry Pi Board ( we use raspberry pi model B )
- TFT LCD ( Adafruit Chip Set ILI9341 or compatible) we use 2.2" TFT LCD from Elec Freaks


Feature:
- TFT01_2.2 SP is a 2.2 "SPI TFT LCD Screen Module, 10pins interface, compatible LCD5110 interface. Not just a LCD break but include SD card (2GB),
- The LCD in the TFT01 is ILI9341. It's a 240 * 320 (resolution), 2.2S inch TFT LCD screen.The LCD has a wide viewing angle, the contrast is also very suitable.
- The display interface is serial, it just needs 5 wires (CS, RS, SCL, SDA, RST) for controlling.
- Replace LCD5110, Support direct plug in ElecFreaks Joystick shield, EFCom, Key Pad Shield etc
- SDcard use hardware SPI interface (CS / MOSI / MISO / SCK), Not solder pins.
Parameter:
- SDO: Serial clock output
- LED: 3.3V IO and Power Supply pin
- SCL: Serial clock input
- SDA / SDI: Serial data input
- DC: Data / Command selection
- RST: Reset, Low level active
- CS: Chip Selection, Low level active
- GND: Ground
- VDD33: 3.3V Power Supply pin
- UTFT Support
Wiring Diagram

Raspberry Pi ( Model B )
|
TFT LCD
|
Pin 3.3V
|
Pin VCC
|
Pin GND
|
Pin GND
|
GPIO18
|
Pin DC
|
GPIO23
|
Pin Reset
|
GPIO10 ( SPI0 MOSI )
|
Pin SDI(MOSI)
|
GPIO11 ( SPI0 SCLK )
|
Pin SCK
|
GPIO08 ( SPI0 CE0 )
|
Pin CS
|
TFT LCD Pinout

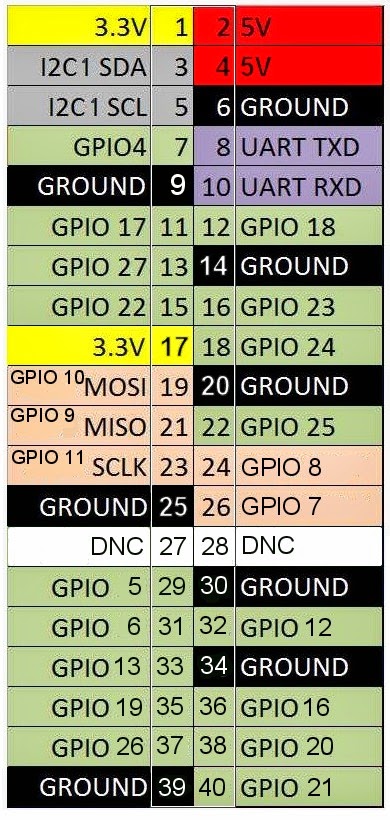
Raspberry Pi Pinout

use Python ILI9341 TFT LCD Library from Adafruit
https://github.com/adafruit/Adafruit_Python_ILI9341
Python Code image.py
import Image
import Adafruit_ILI9341 as TFT
import Adafruit_GPIO as GPIO
import Adafruit_GPIO.SPI as SPI
# Raspberry Pi
configuration.
DC = 18
RST = 23
SPI_PORT = 0
SPI_DEVICE = 0
# BeagleBone Black
configuration.
# DC = 'P9_15'
# RST = 'P9_12'
# SPI_PORT = 1
# SPI_DEVICE = 0
# Create TFT LCD
display class.
disp =
TFT.ILI9341(DC, rst=RST, spi=SPI.SpiDev(SPI_PORT, SPI_DEVICE, max_speed_hz=64000000))
# Initialize
display.
disp.begin()
# Load an image.
print 'Loading image...'
image = Image.open('cat.jpg')
# Resize the image
and rotate it so it's 240x320 pixels.
image = image.rotate(90).resize((240, 320))
# Draw the image on
the display hardware.
print 'Drawing image'
disp.display(image)
Python Code shapes.py
import Image
import ImageDraw
import ImageFont
import Adafruit_ILI9341 as TFT
import Adafruit_GPIO as GPIO
import Adafruit_GPIO.SPI as SPI
# Raspberry Pi
configuration.
DC = 18
RST = 23
SPI_PORT = 0
SPI_DEVICE = 0
# BeagleBone Black
configuration.
# DC = 'P9_15'
# RST = 'P9_12'
# SPI_PORT = 1
# SPI_DEVICE = 0
# Create TFT LCD
display class.
disp =
TFT.ILI9341(DC, rst=RST, spi=SPI.SpiDev(SPI_PORT, SPI_DEVICE, max_speed_hz=64000000))
# Initialize
display.
disp.begin()
# Clear the display
to a red background.
# Can pass any tuple
of red, green, blue values (from 0 to 255 each).
disp.clear((255, 0, 0))
# Alternatively can
clear to a black screen by calling:
# disp.clear()
# Get a PIL Draw
object to start drawing on the display buffer.
draw = disp.draw()
# Draw some shapes.
# Draw a blue
ellipse with a green outline.
draw.ellipse((10, 10, 110, 80), outline=(0,255,0), fill=(0,0,255))
# Draw a purple
rectangle with yellow outline.
draw.rectangle((10, 90, 110, 160), outline=(255,255,0), fill=(255,0,255))
# Draw a white X.
draw.line((10, 170, 110, 230), fill=(255,255,255))
draw.line((10, 230, 110, 170), fill=(255,255,255))
# Draw a cyan
triangle with a black outline.
draw.polygon([(10, 275), (110, 240), (110, 310)], outline=(0,0,0), fill=(0,255,255))
# Load default font.
font =
ImageFont.load_default()
# Alternatively load
a TTF font.
# Some other nice
fonts to try: http://www.dafont.com/bitmap.php
#font =
ImageFont.truetype('Minecraftia.ttf', 16)
# Define a function
to create rotated text. Unfortunately
PIL doesn't have good
# native support for
rotated fonts, but this function can be used to make a
# text image and
rotate it so it's easy to paste in the buffer.
def draw_rotated_text(image,
text, position, angle, font, fill=(255,255,255)):
# Get rendered font width and height.
draw = ImageDraw.Draw(image)
width, height = draw.textsize(text,
font=font)
# Create a new image with transparent
background to store the text.
textimage = Image.new('RGBA', (width, height), (0,0,0,0))
# Render the text.
textdraw = ImageDraw.Draw(textimage)
textdraw.text((0,0), text, font=font,
fill=fill)
# Rotate the text image.
rotated = textimage.rotate(angle, expand=1)
# Paste the text into the image, using it as
a mask for transparency.
image.paste(rotated, position, rotated)
# Write two lines of
white text on the buffer, rotated 90 degrees counter clockwise.
draw_rotated_text(disp.buffer,
'Hello
World!', (150, 120), 90, font, fill=(255,255,255))
draw_rotated_text(disp.buffer,
'This
is a line of text.', (170, 90), 90, font, fill=(255,255,255))
# Write buffer to
display hardware, must be called to make things visible on the
# display!
disp.display()
Don't forget Disable blacklist
blacklist file
/etc/modprobe.d/raspi-blacklist.conf
nano /etc/modprobe.d/raspi-blacklist.conf
# blacklist spi and i2c by default (many users don't need them)
#blacklist spi-bcm2708
#blacklist i2c-bcm2708
Reference
Adafruit 2.2” TFT connect BeagleBone Black ( or Raspberry Pi
)
Adafruit Raspberry Pi TFT Python Library _ILI9341
2.2" TFT LCD from Elec Freaks
Wiring Diagram
Code form GitHub
Enable SPI for Raspberry Pi
http://www.brianhensley.net/2012/07/getting-spi-working-on-raspberry-pi.html<< บทความต่อไป >>
My Website
email : info@softpowergroup.net Tel .081-6452400